All I need is to make it longer. One can never have a bench that’s too long. I’m planing for 12 feet. Extending the length requires some longer lumber and an extra pair of legs.
Chris Schawarz’s is a winner. As a cabinet maker and writer about woodworking, he has made a number of workbenches. The unique thing about his book is a chapter in which he analyzes almost any woodworking task imaginable and classifies all the ways a bench might handle them. This analysis ends up with plans for two benches, one built incredibly heavy and perfect for cabinet makers, the other lighter and originally used by for 19th century joiners. This lighter bench, which Chris calls , looks ideal for boat building work. The most appealing feature is the ability to clamp long boards to the face aprons, enabling the kinds of edge working that is prevalent in boat building.
That stange looking thing I’ve been using as a workbench is actually the building horse for the Fiddlehead canoe. Once enough frame parts are ready, they’ll be set up on the building horse. Then, what will I use for a workbench?
Speaking of pianos, who needs a grand piano to play honky tonk music, except maybe ? His latest collection “ ” is great music for drilling mortises.
A week later, I’m ready to cut mortises for these rails and I look over and see… Two of the three, all from the same board are now cupped. Yes, wood moves. Yet, I was a bit surprised to see these pieces change shape rather suddenly after being flat for a few weeks. It’s also interesting that the tenons aren’t cupped as much as the thicker part of the wood.ВP No, I’m not going to flatten the pieces again. This is a workbench, not a grand piano, and those rails will do very well as they are. All of the important strength and bearing surfaces are unaffected by whether the piece is dead flat or cupped a bit.
Time to move to the upper rails. These guys are heftier, currently being 9 inches wide. I got them out of a 2 x 10 that I know sat idle in an air conditioned Home Depot store for about three months. I had it in my shop about a week before I began working it. After dimensioning the wood, I rough cut it into the three pieces, noting that the newly cut ends felt about the same temperature as the outside edge of the wood. That’s a rough indication of relative dryness. (No, I’m not going to buy a $300 moisture meter.) I stickered the three pieces and let them sit for about a week while doing other things. When I came back to them, they were absolutely flat. So, I cut their tenons and set the pieces aside, still dead flat.
After dimensioning the lumber and laminating the parts, it’s time to cut mortises. The bottom rails are also 2 x 4 and fit in blind mortises in the thicker part of the legs.ВP The way this is done in a powered workshop is with a drill press, using a fence to assure correct spacing of the mortise. As you can see, I’m using my made-in-1896 cordless drill and the chance of using an accurate fence is nil. Yeah, I toyed with making a block that could ride on the bit and act as a fence, but it didn’t seem stable enough.ВP Instead, I incise the center line of the mortise with a chisel. Make that deep enough, and the center point of a forstner bit falls right in place. Nice! Now, there is one thing that a drill press can do that a hand drill cannot. With a drill press, the bit can be moved anywhere in the mortise to remove almost all the waste. Can’t be done by hand, so there’s a bit more chisel work to be done. Six legs, three rails, six blind mortises. These were my first mortise and tenon joints and I’m pleased with the results.
The legs for the workbench are laminated from two pieces of 2 x 4. They are actually gotten out of rather nice 2 x 6s that aren’t nearly as gnarly and twisted as a typical 2 x 4.
This marks the use of 4 boards of the 14 purchased. Only 10 more to dimension and put to use.
The 8 foot bench in has two sets of legs. My 12 foot bench will have 3 sets. While it probably isn’t needed, I decided to use the drawboring technique that Chris Schwarz describes. The technique drives dowels through the tenons, with the holes in the tenons set 1/16 inch closer to the shoulders than the holes in the mortised piece. Hammering the dowels in, draws the tenons deeply into the mortise. It really tightens up mortise and tenon joints, and has the side benefit of eliminating the need for clamps while the glue sets.
Oh, an attractive decorative adornment results from making a mistake. Much of the bench building advice I’ve read suggests starting with 2 x 12 lumber because, they say, it is less likely to be cupped and twisted. Those folks haven’t seen the 2 x 12s that we have in our stores, wretched nasty stuff.ВP I used pairs of 2 x 6s hoping that when joined I could get the 11 inches needed to fill the lap already provided in the legs.ВP Well, that was not to be. The aprons finished out at 10 and 5/8. Should I just whack off the top of the legs to match? No, that would lower the height beyond what I wanted. Instead, some nice bits of cherry now fill the gaps, lift the aprons to proper height, and add just a bit of accent.
Four more boards dimensioned and joined, making the aprons.ВP Then a lot of boring, followed by glue up and reinforcing screws.ВP Already, with no top boards in place, one can feel how sturdy and free of racking this bench will be.
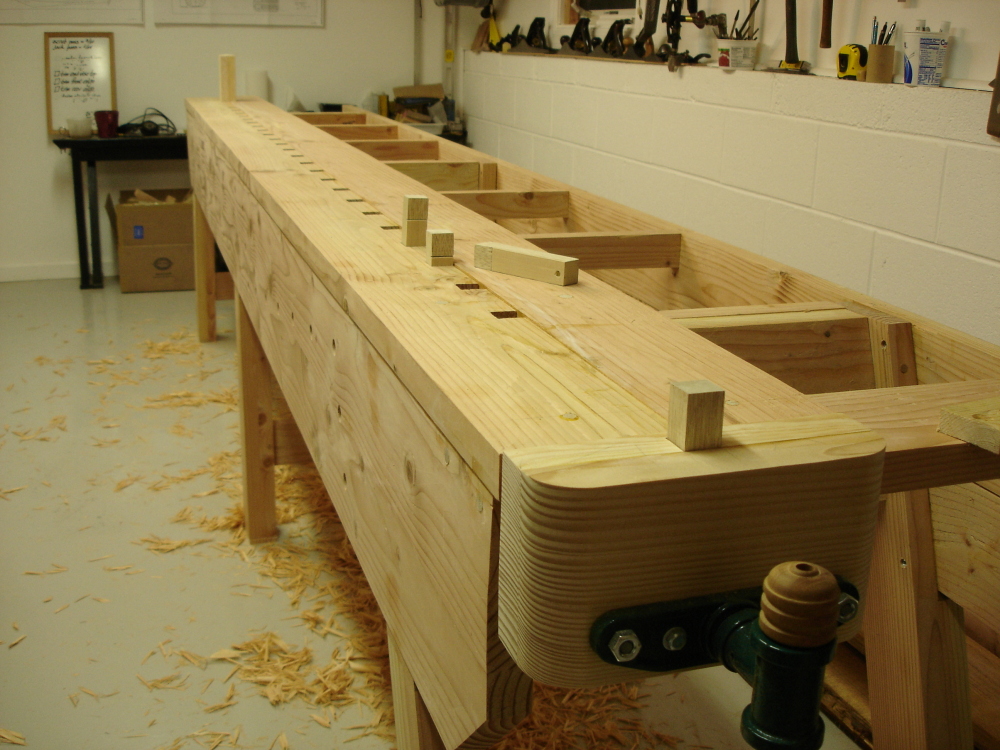
There are a lot of rough edges at this point: the top surface of the boards are not even with each other, the boards are slightly over length, and the vise face needs trimming both on the top and on the side that ajoins the apron. All will be resolved when the top is complete. Way down at the other end is a 2 inch by 2 inch planing stop, made of the same ramin as the dogs.
The usual procedure for building a bench is to glue up the entire top all at once. I have strayed from that path for two reasons. First, I don’t have a reliably flat reference surface 12 feet long that I can use for the glue up. Second, I imagine that the accumulated weight and length would make the complete top heavier than I can manage alone. So, I’m adding a board at a time directly to the bench frame. Attachment is a combination of glue and .
The vise is a very simple that I’m using as a tail vise. The face block for it holds the moveable dog.
OK. Next we need holes for the dogs, and a vise. Two boards were use to form the holes, one to hold all 25 dog holes, and the other to close them. Since this bench has a thin top, the depth of the dog holes is doubled by gluing another board below, making the bench twice as thick along the row of dog holes. All holes were hand sawn and chiseled. They are remarkably similar in size.
Every respectable woodworking bench has dogs and a vise for clamping work against the dogs. There are several styles of dogs commercially available. Most of them are metal, and I prefer keeping metal as far away from my plane irons as possible. I decided to make, rather than buy, my dogs and settled on 1 inch square dogs made from ramin hardwood square sticks that are readily available at the home center.ВP The spring leaf for each dog is 1/8 inch thick cedar, leftovers from a little resawing project. A notch is cut for the leaf along one side of a dog, and then a cabinet maker’s rasp cuts a short angle at the end. A brass screw attaches the leaf. I borrowed the design from .
Archive for the ‘workbench’ Category
Woodworking powered by Snickers and Milky Way bars
Bob Easton » workbench
Комментариев нет:
Отправить комментарий